An old Easter decor tutorial....LOVE!
I'm not a big Easter decorator, however I came across these burlap bunnies on pinterest. They didn't have a tutorial, so I was forced to google "burlap bunny tutorial" I came across this website Oopsey Daisy and there it was!! Now, I admit, I did try to come up with a pattern on my own, but it just didn't look as good! Here is the final project
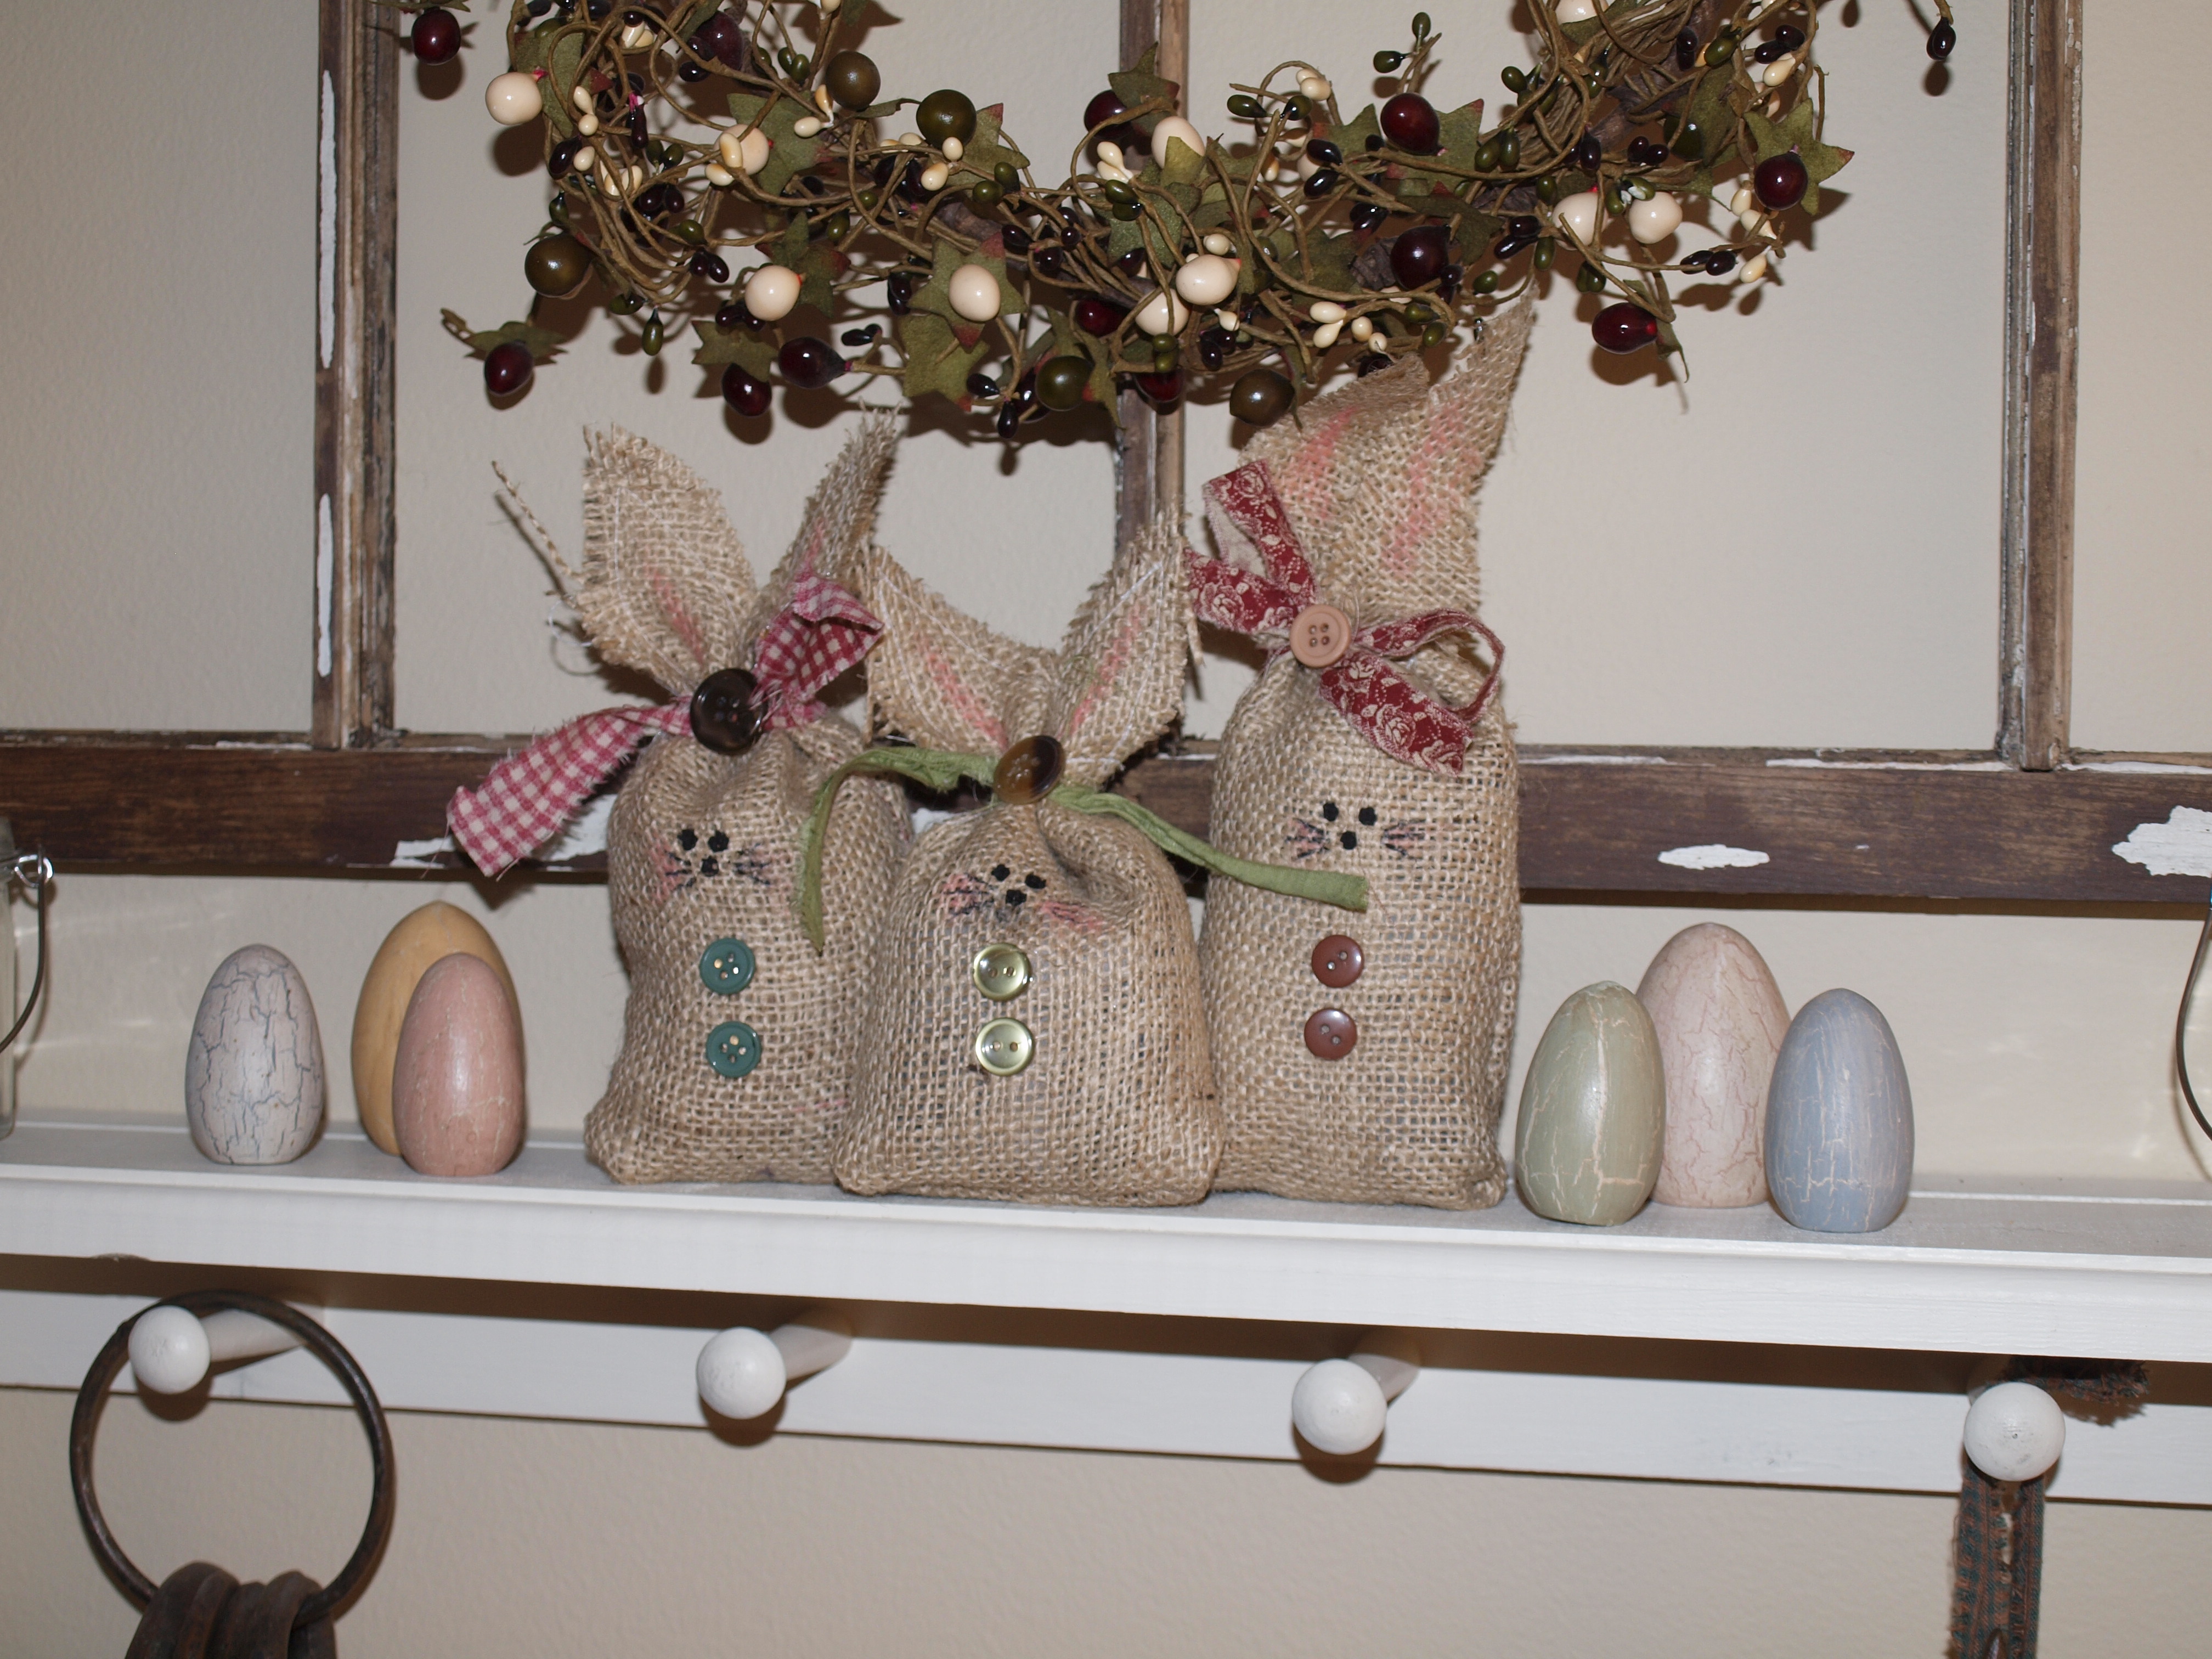
So cute right?! Here's how I did it.
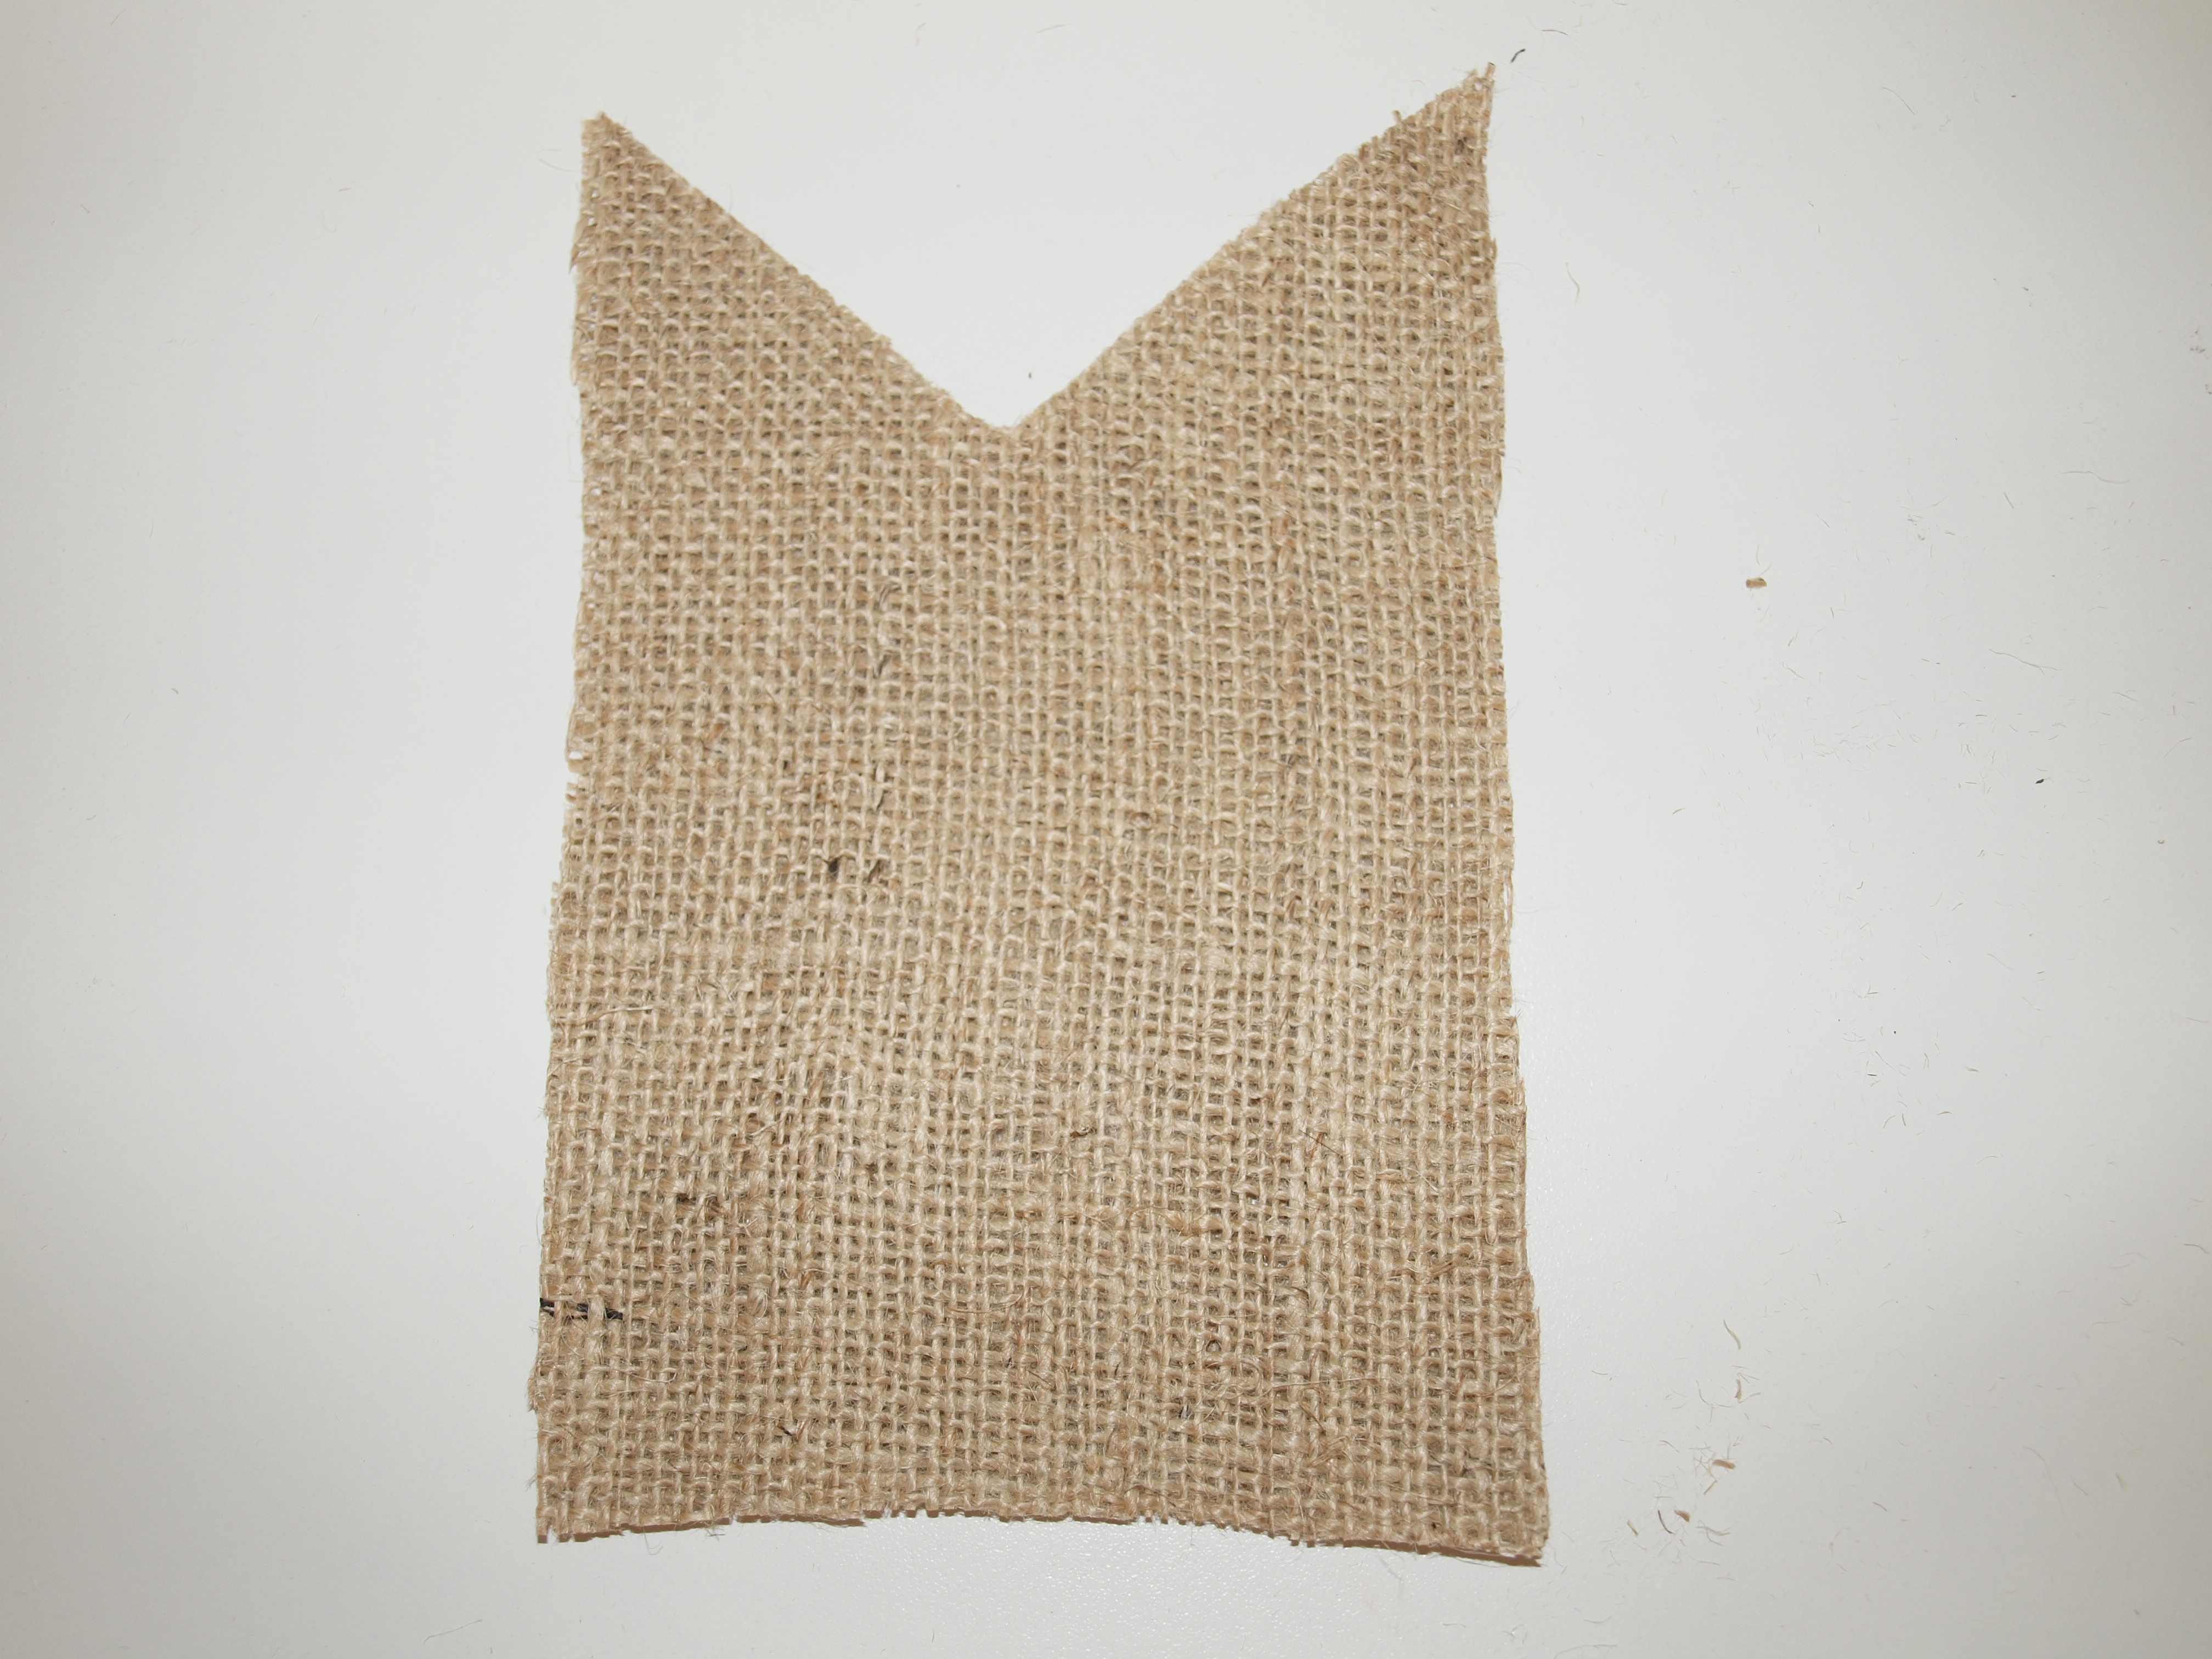
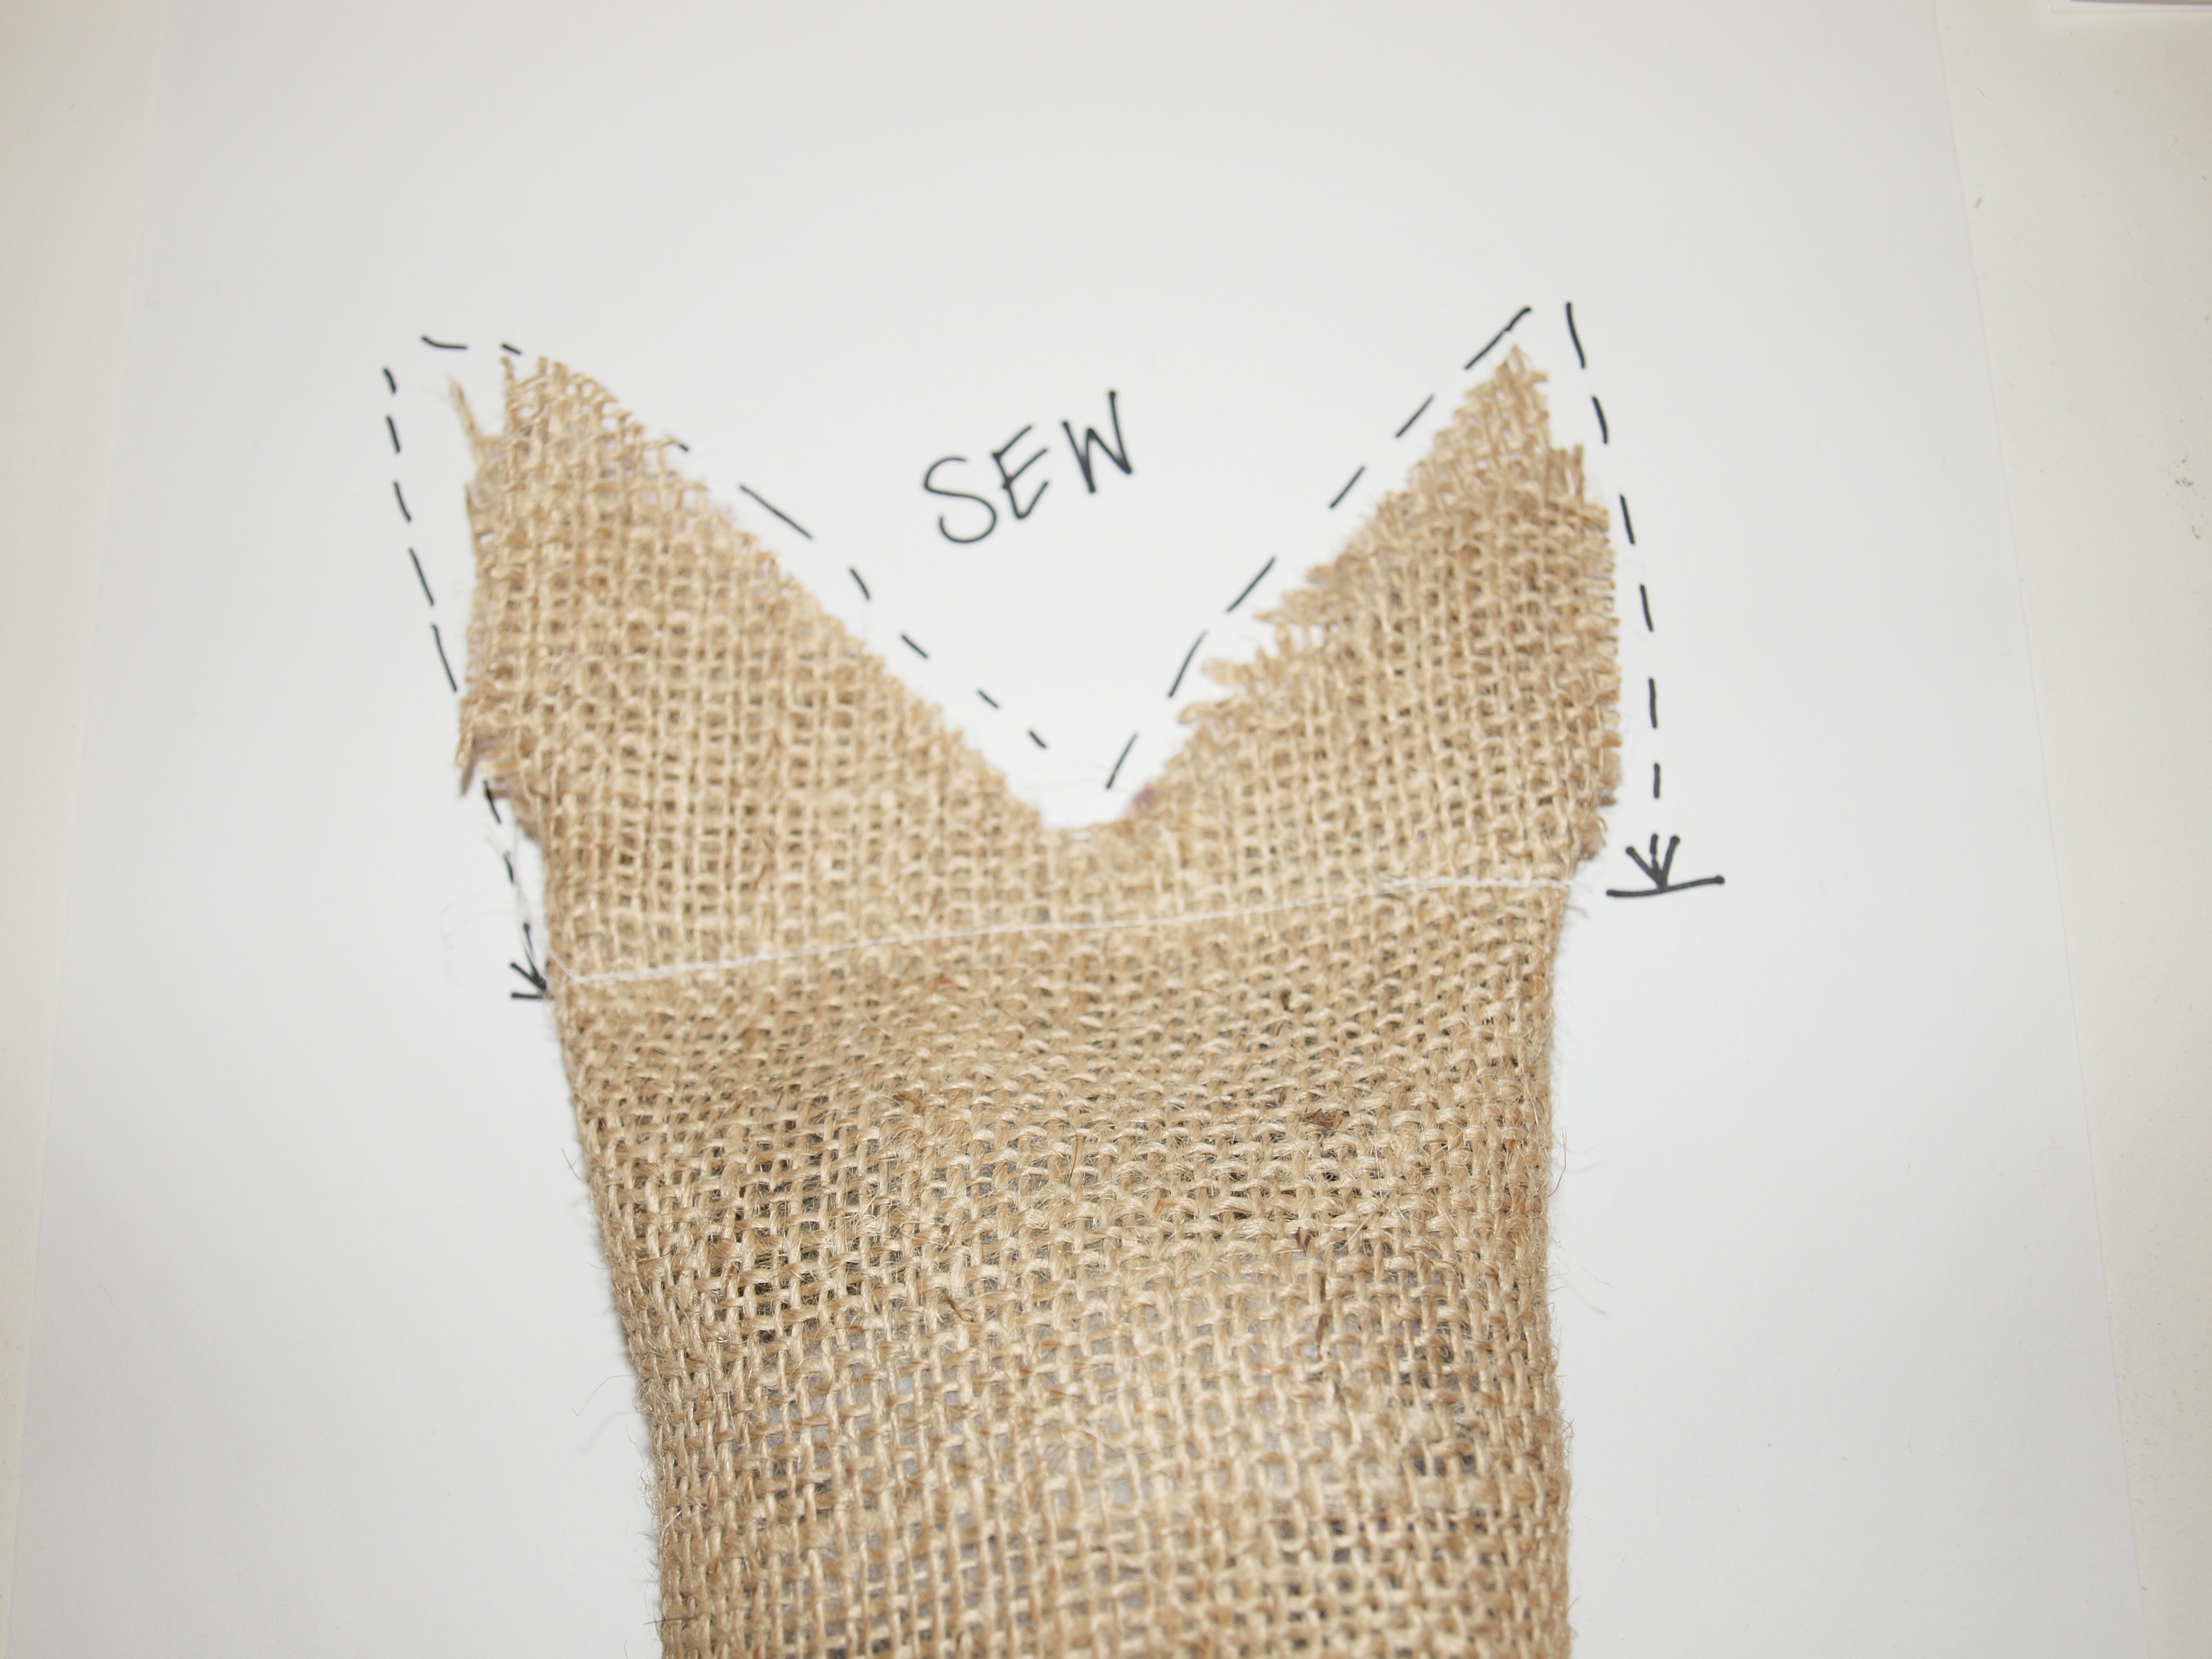
I cut two pieces of burlap exactly the same size (7-1/2 x 4-3/4) you can do whatever size you'd like depending on how big or small you want the bunnies.

Cut a triangle out of the top of both pieces, these will be the ears.
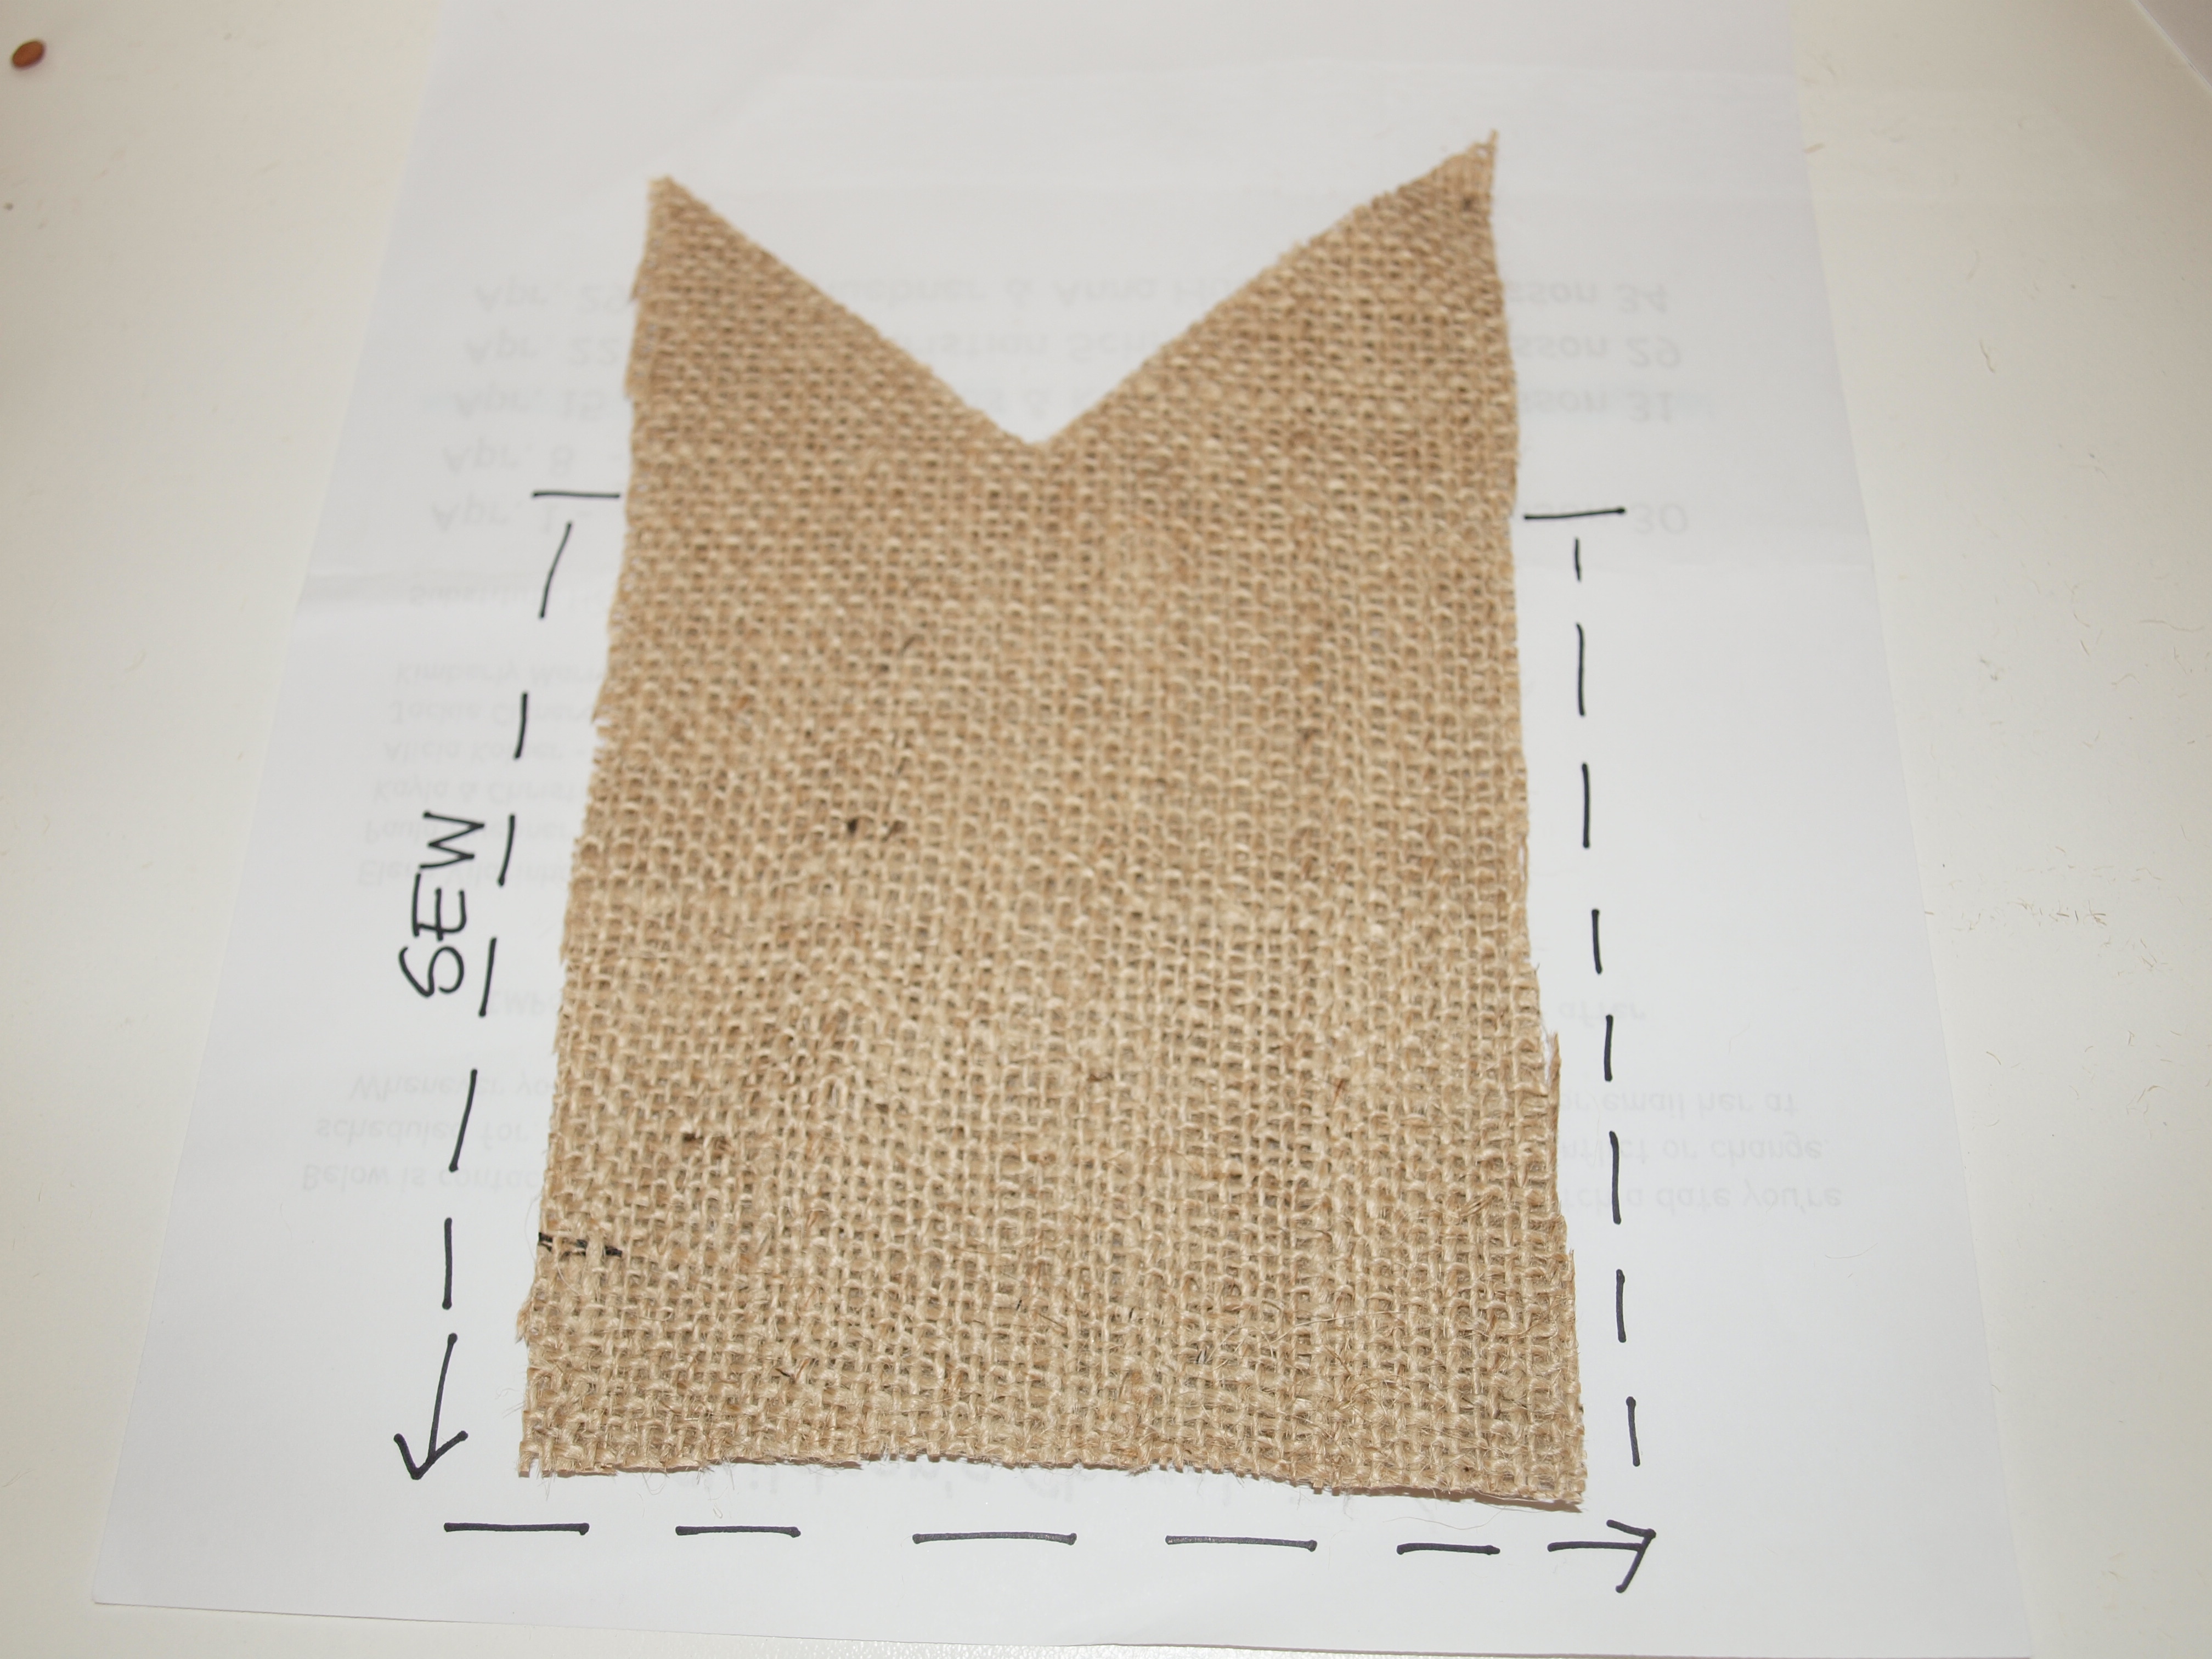
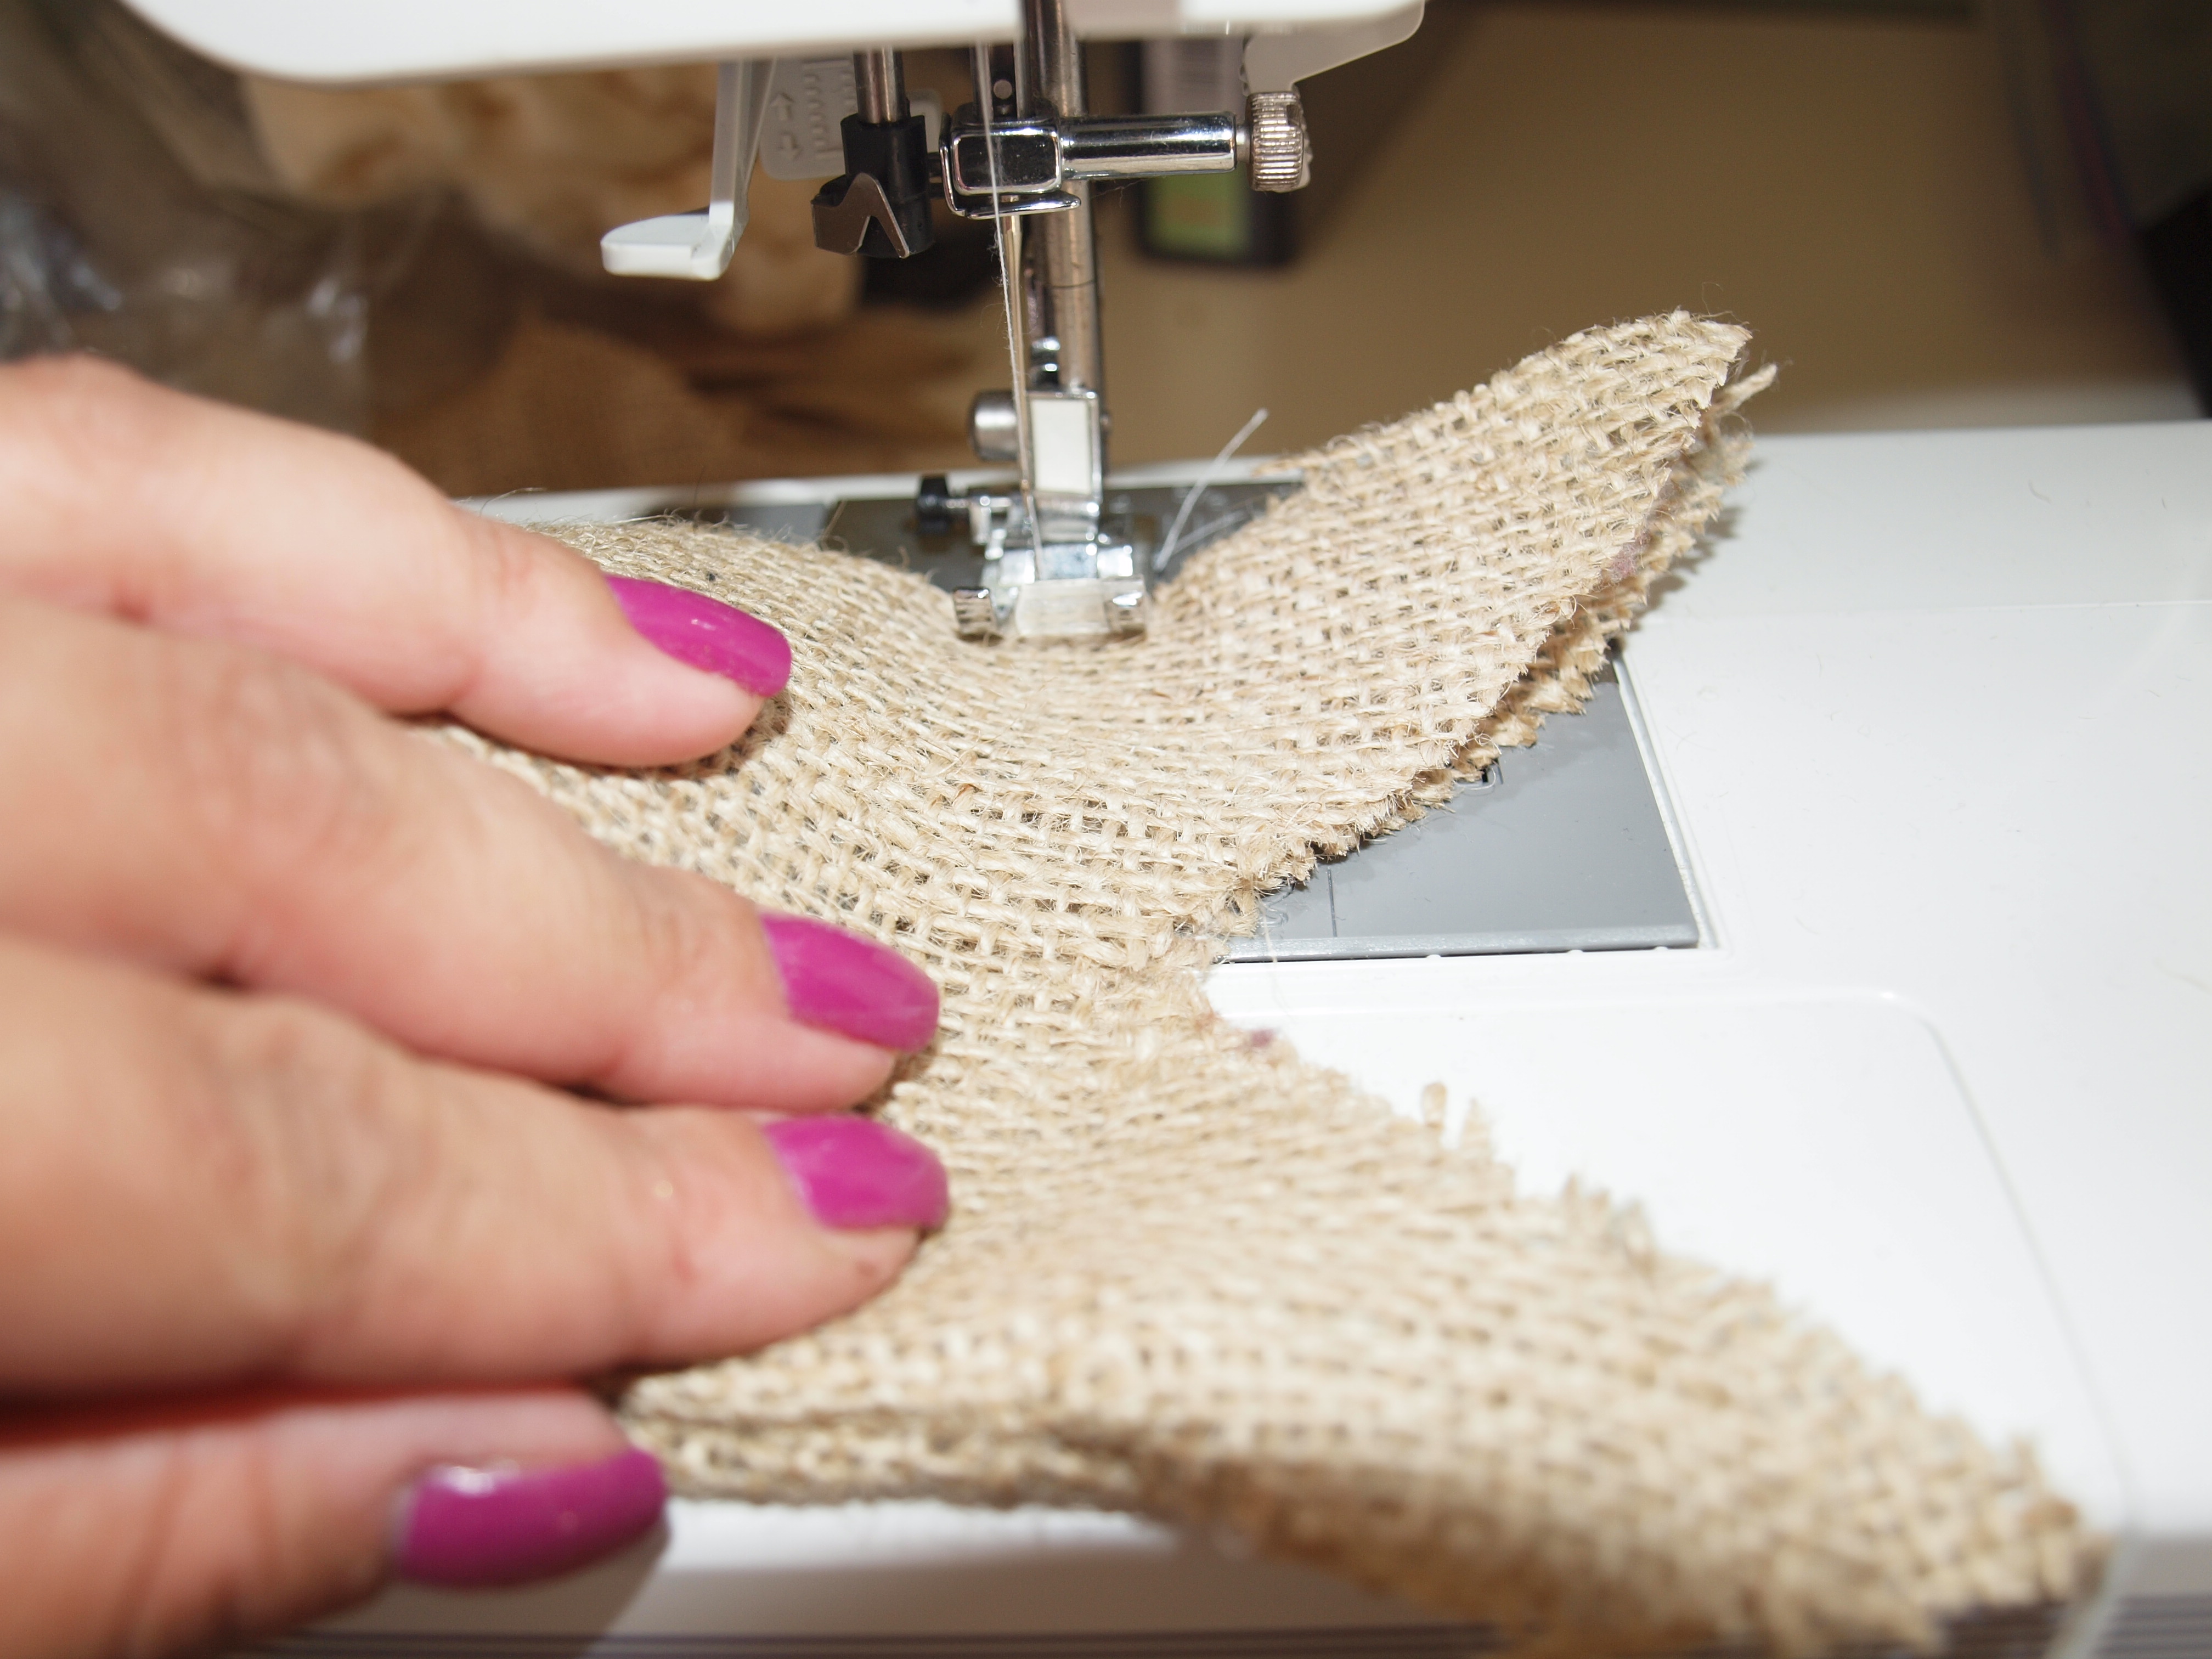
Next you'll need to sew around the edges. Leave out the ears, we will sew those later
Flip it inside out and stuff it, but not too full, you'll need to be able to sew below the ears to seal the stuffing in. I used lentil beans, to stuff mine. You can also use any other type of beans, rice, dryer lint, cotton balls, etc.
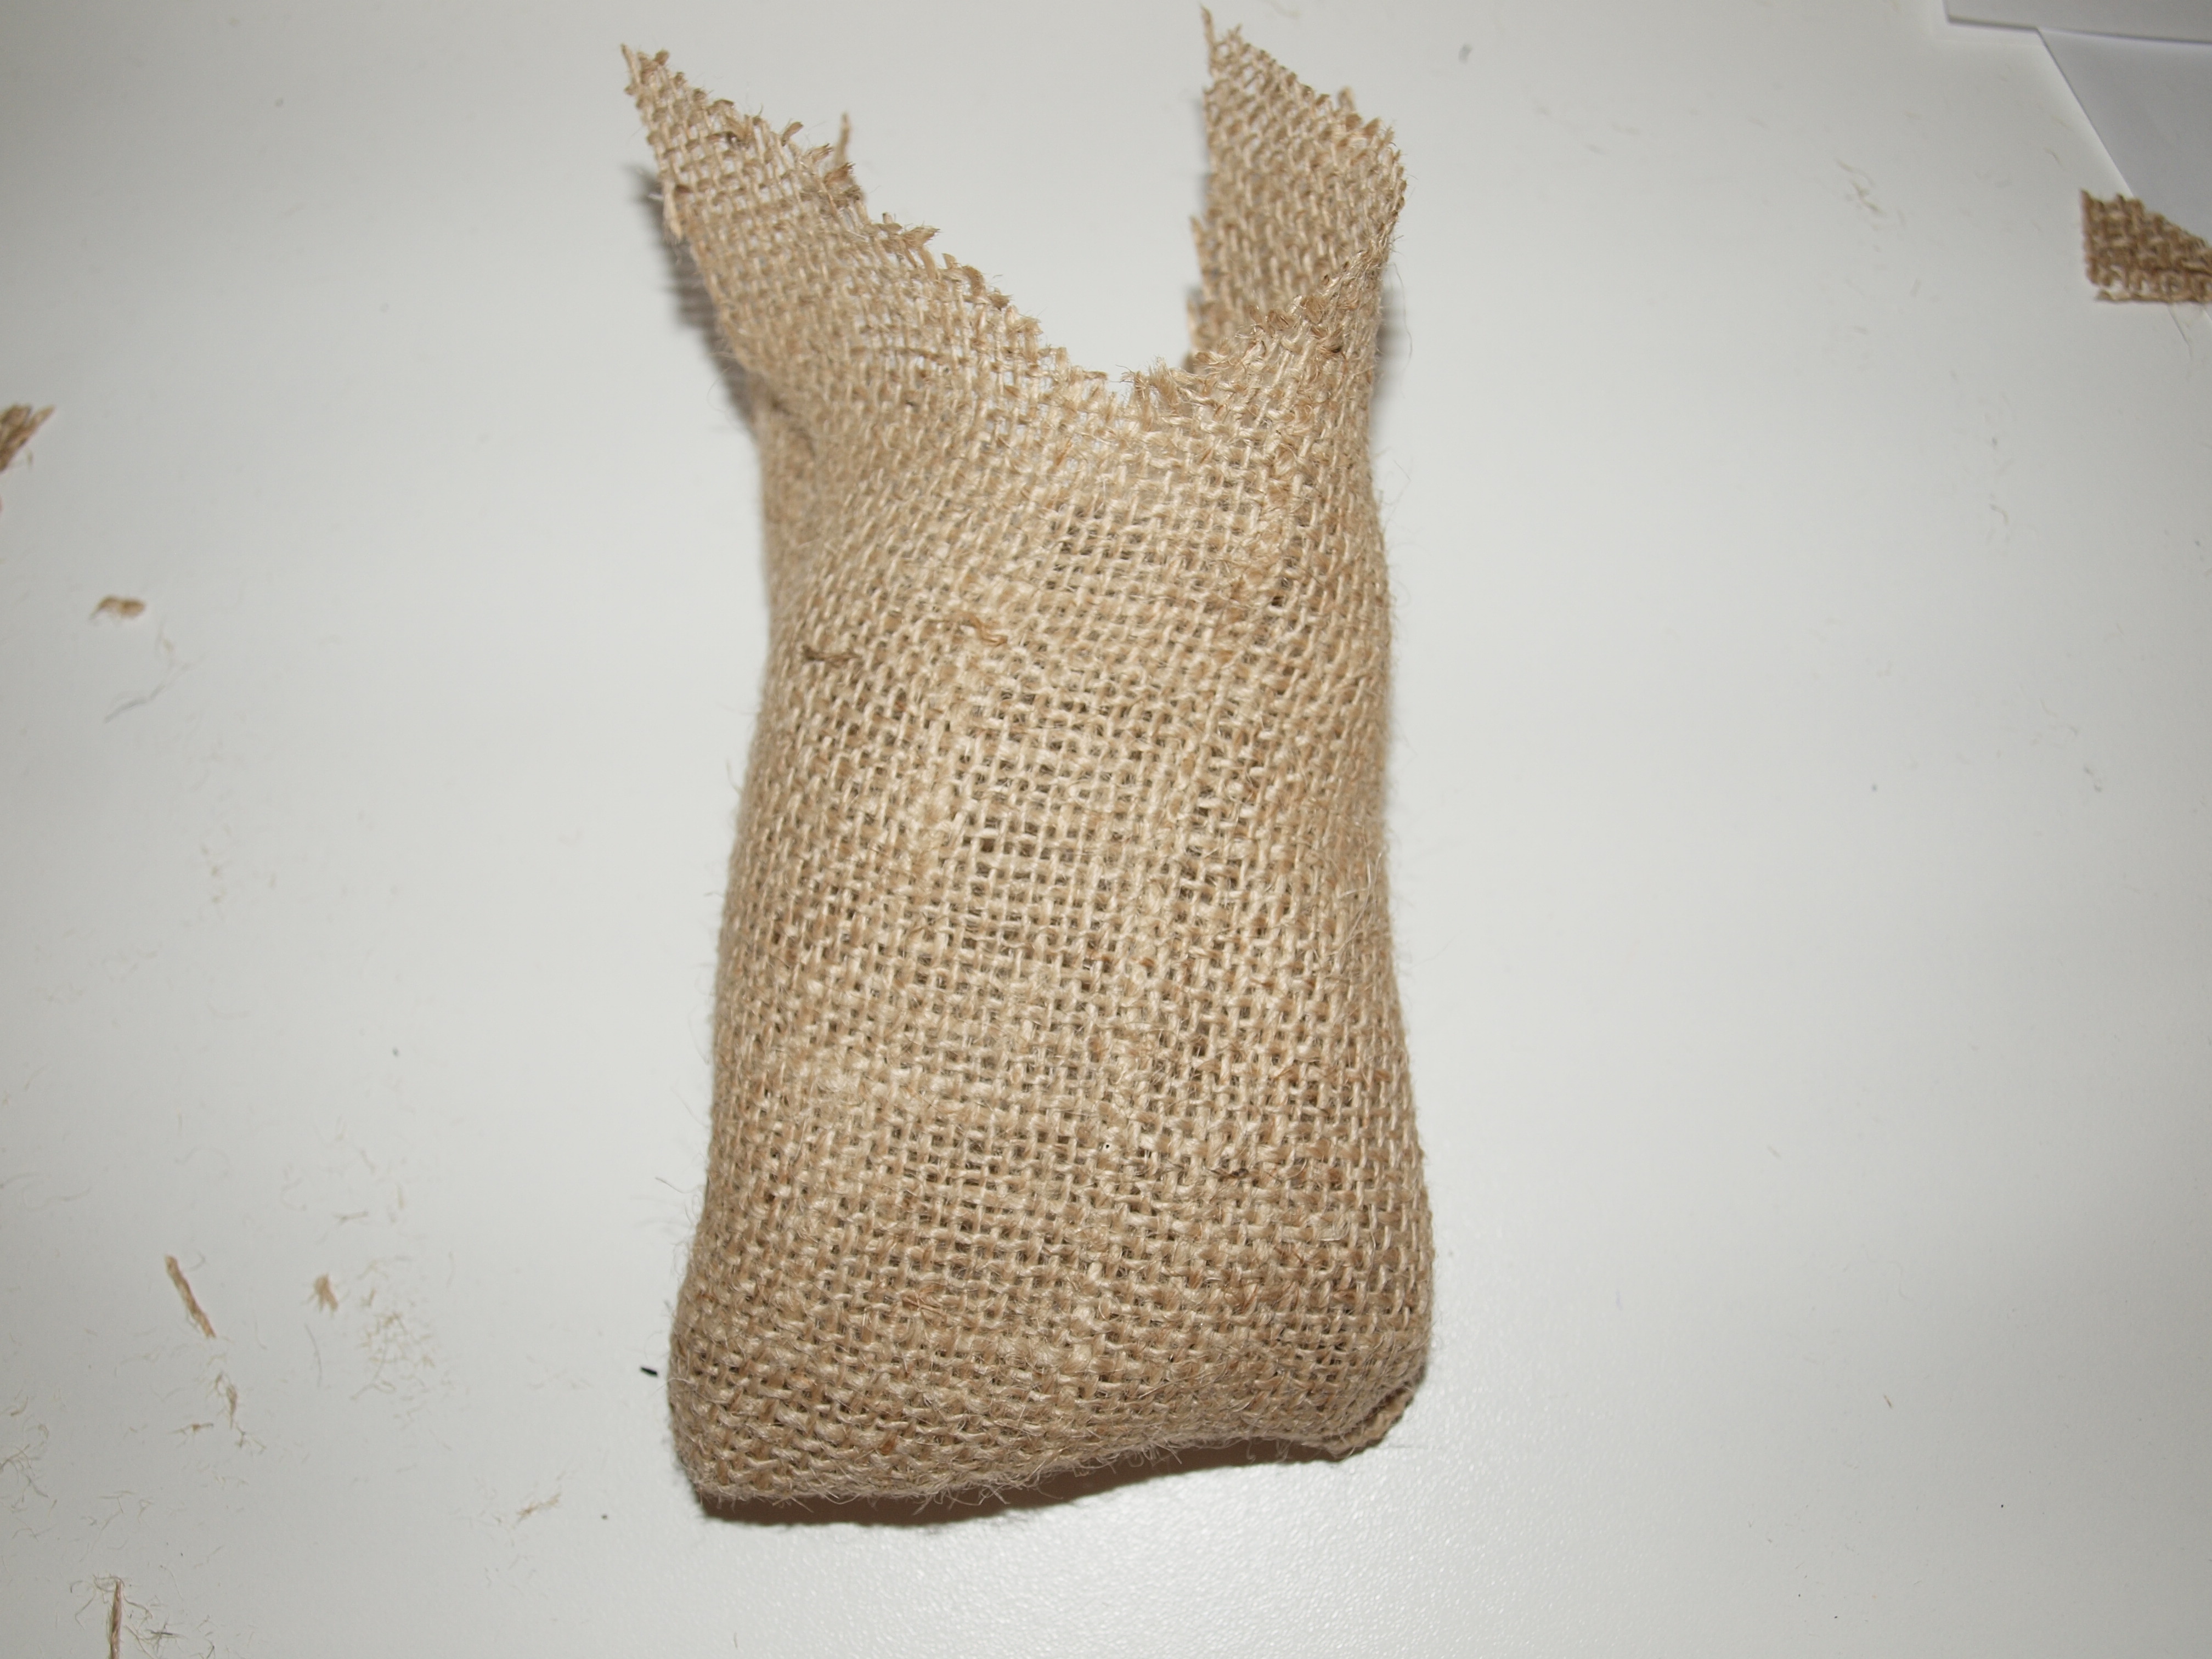
Once it's stuffed sew below the ears from one side to the other.
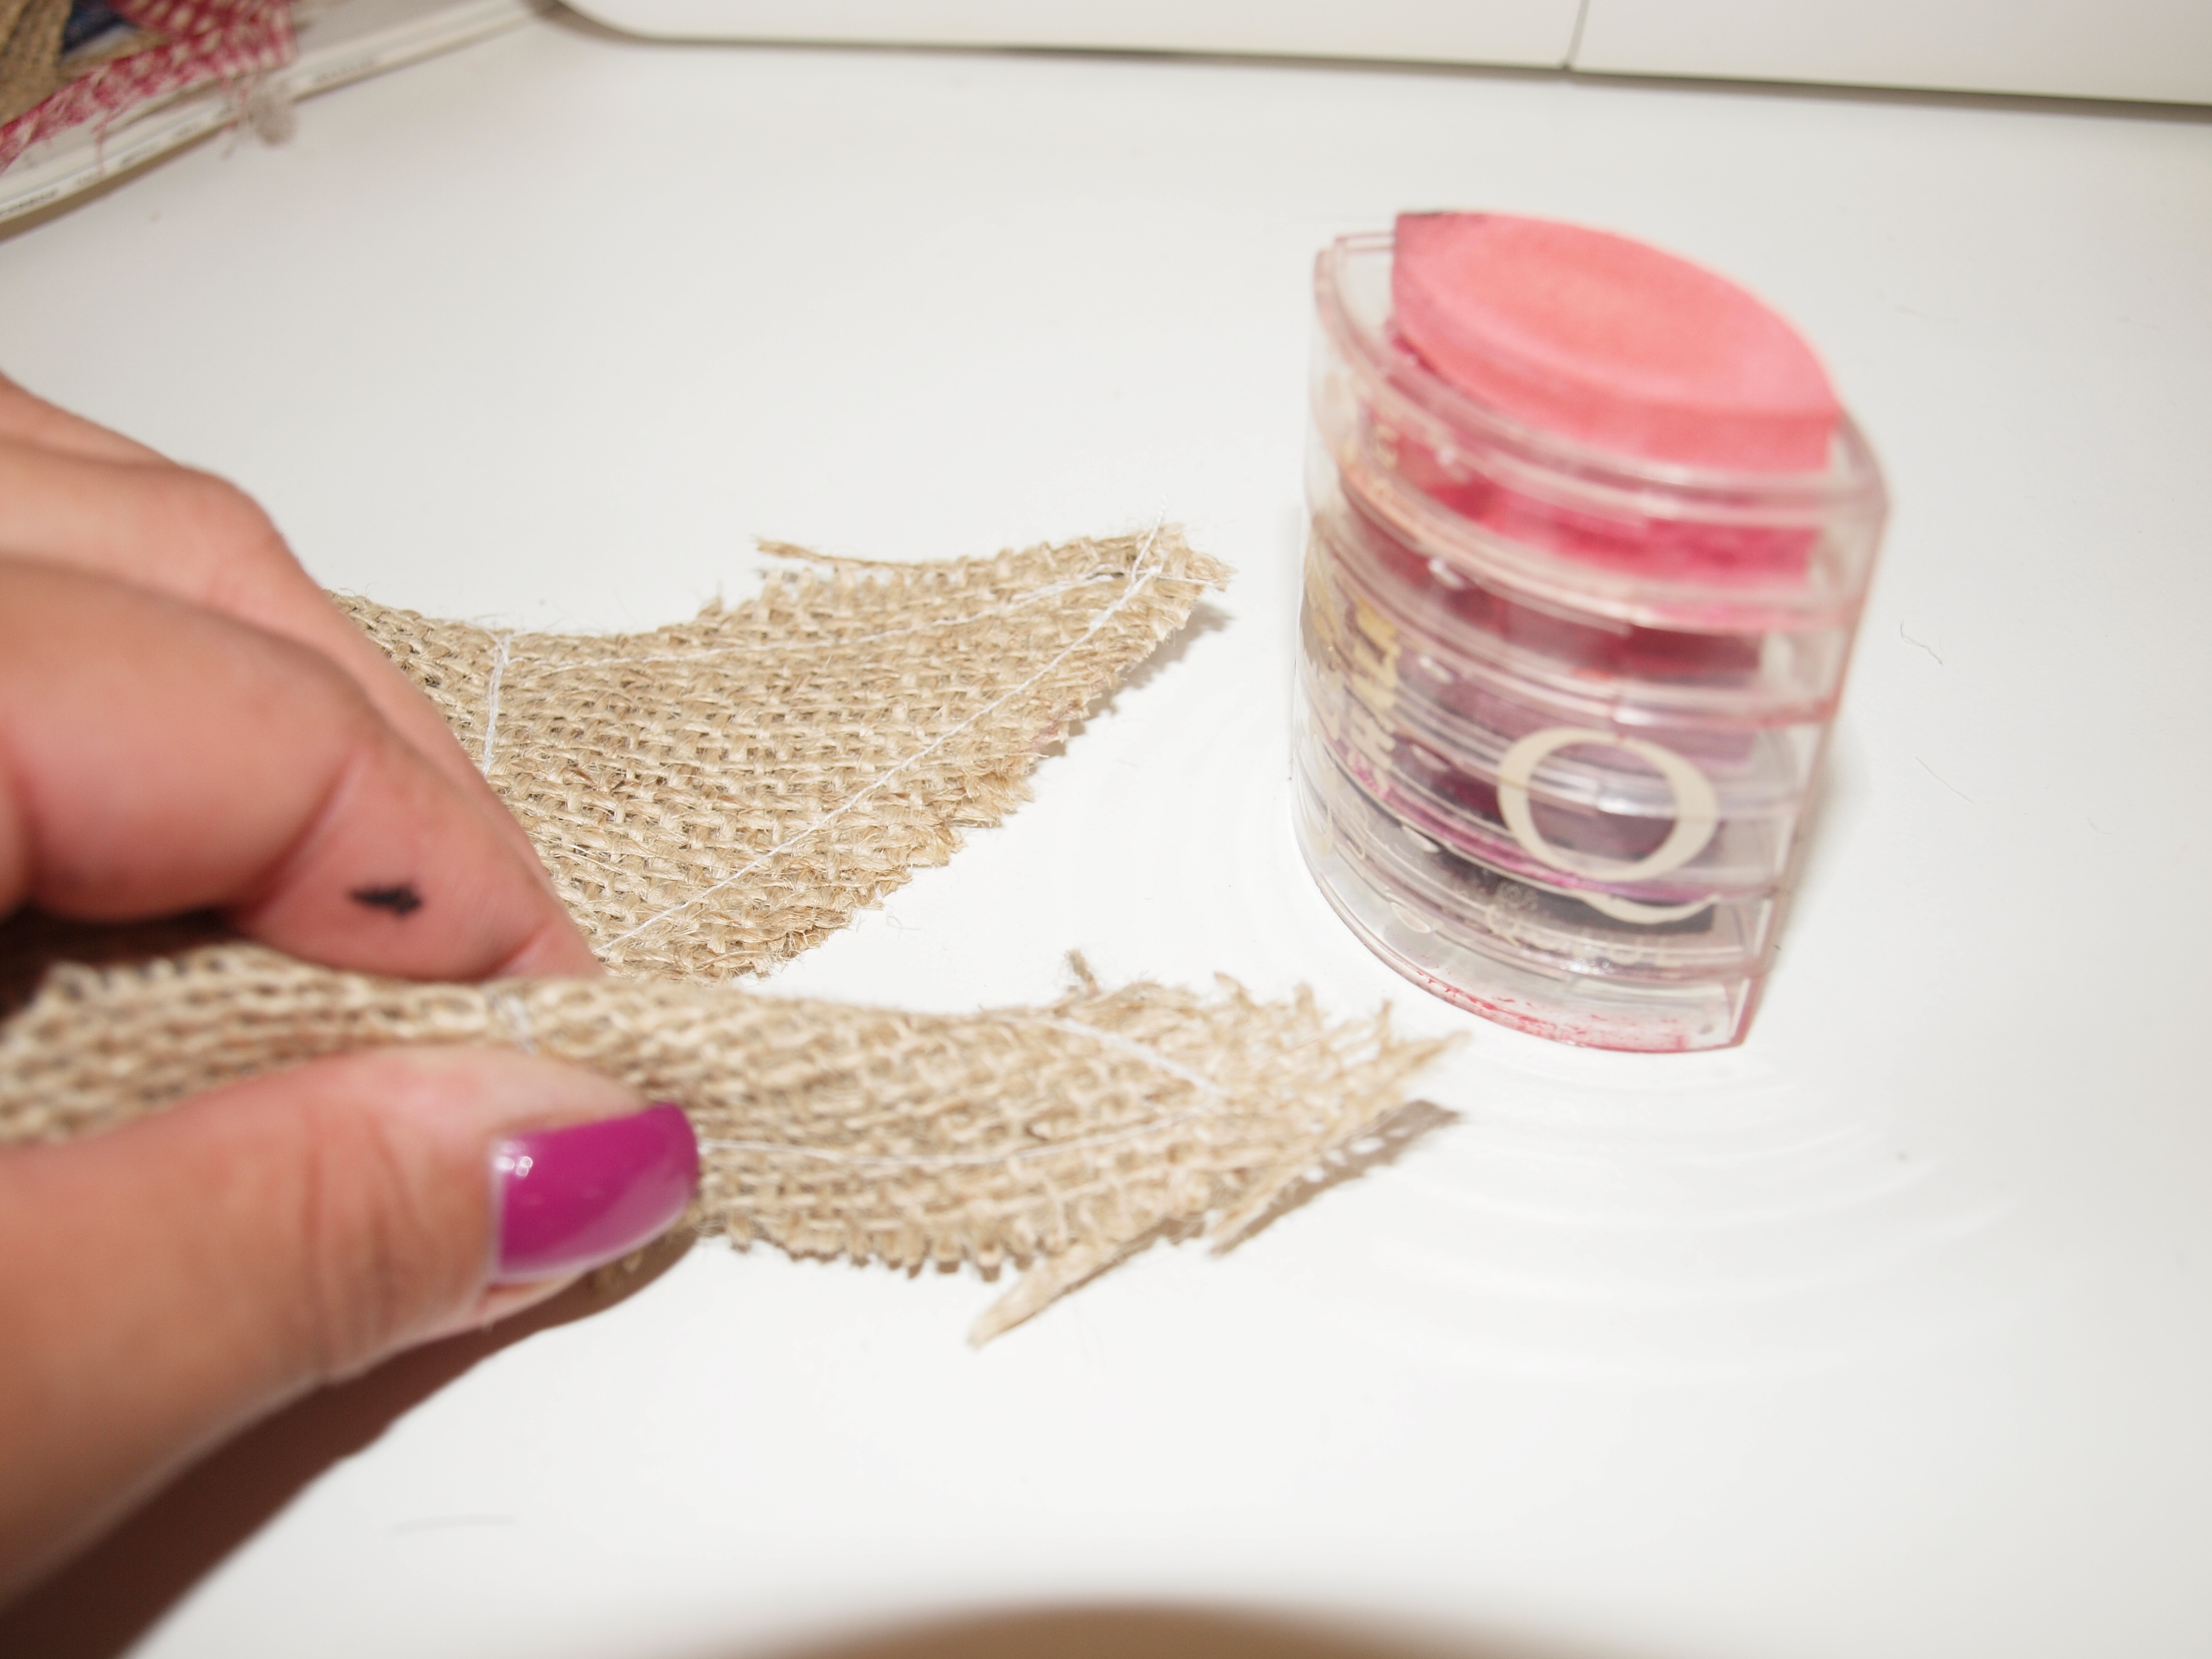
Now we will sew the ears.
I ripped a piece of fabric from my fabric stash to tie below the ears. If you'd like to tint the ears pink in the middle like I did, do this before you tie the ribbon. I used my pink ink pad. I pinched the ears together so I just colored the center.
Now tie the ribbon

I used black acrylic paint to make eyes and a nose with a reed diffuser stick. I used my pink ink pad to make the cheeks nice and rosy, and then I drew whiskers with a sharpie.
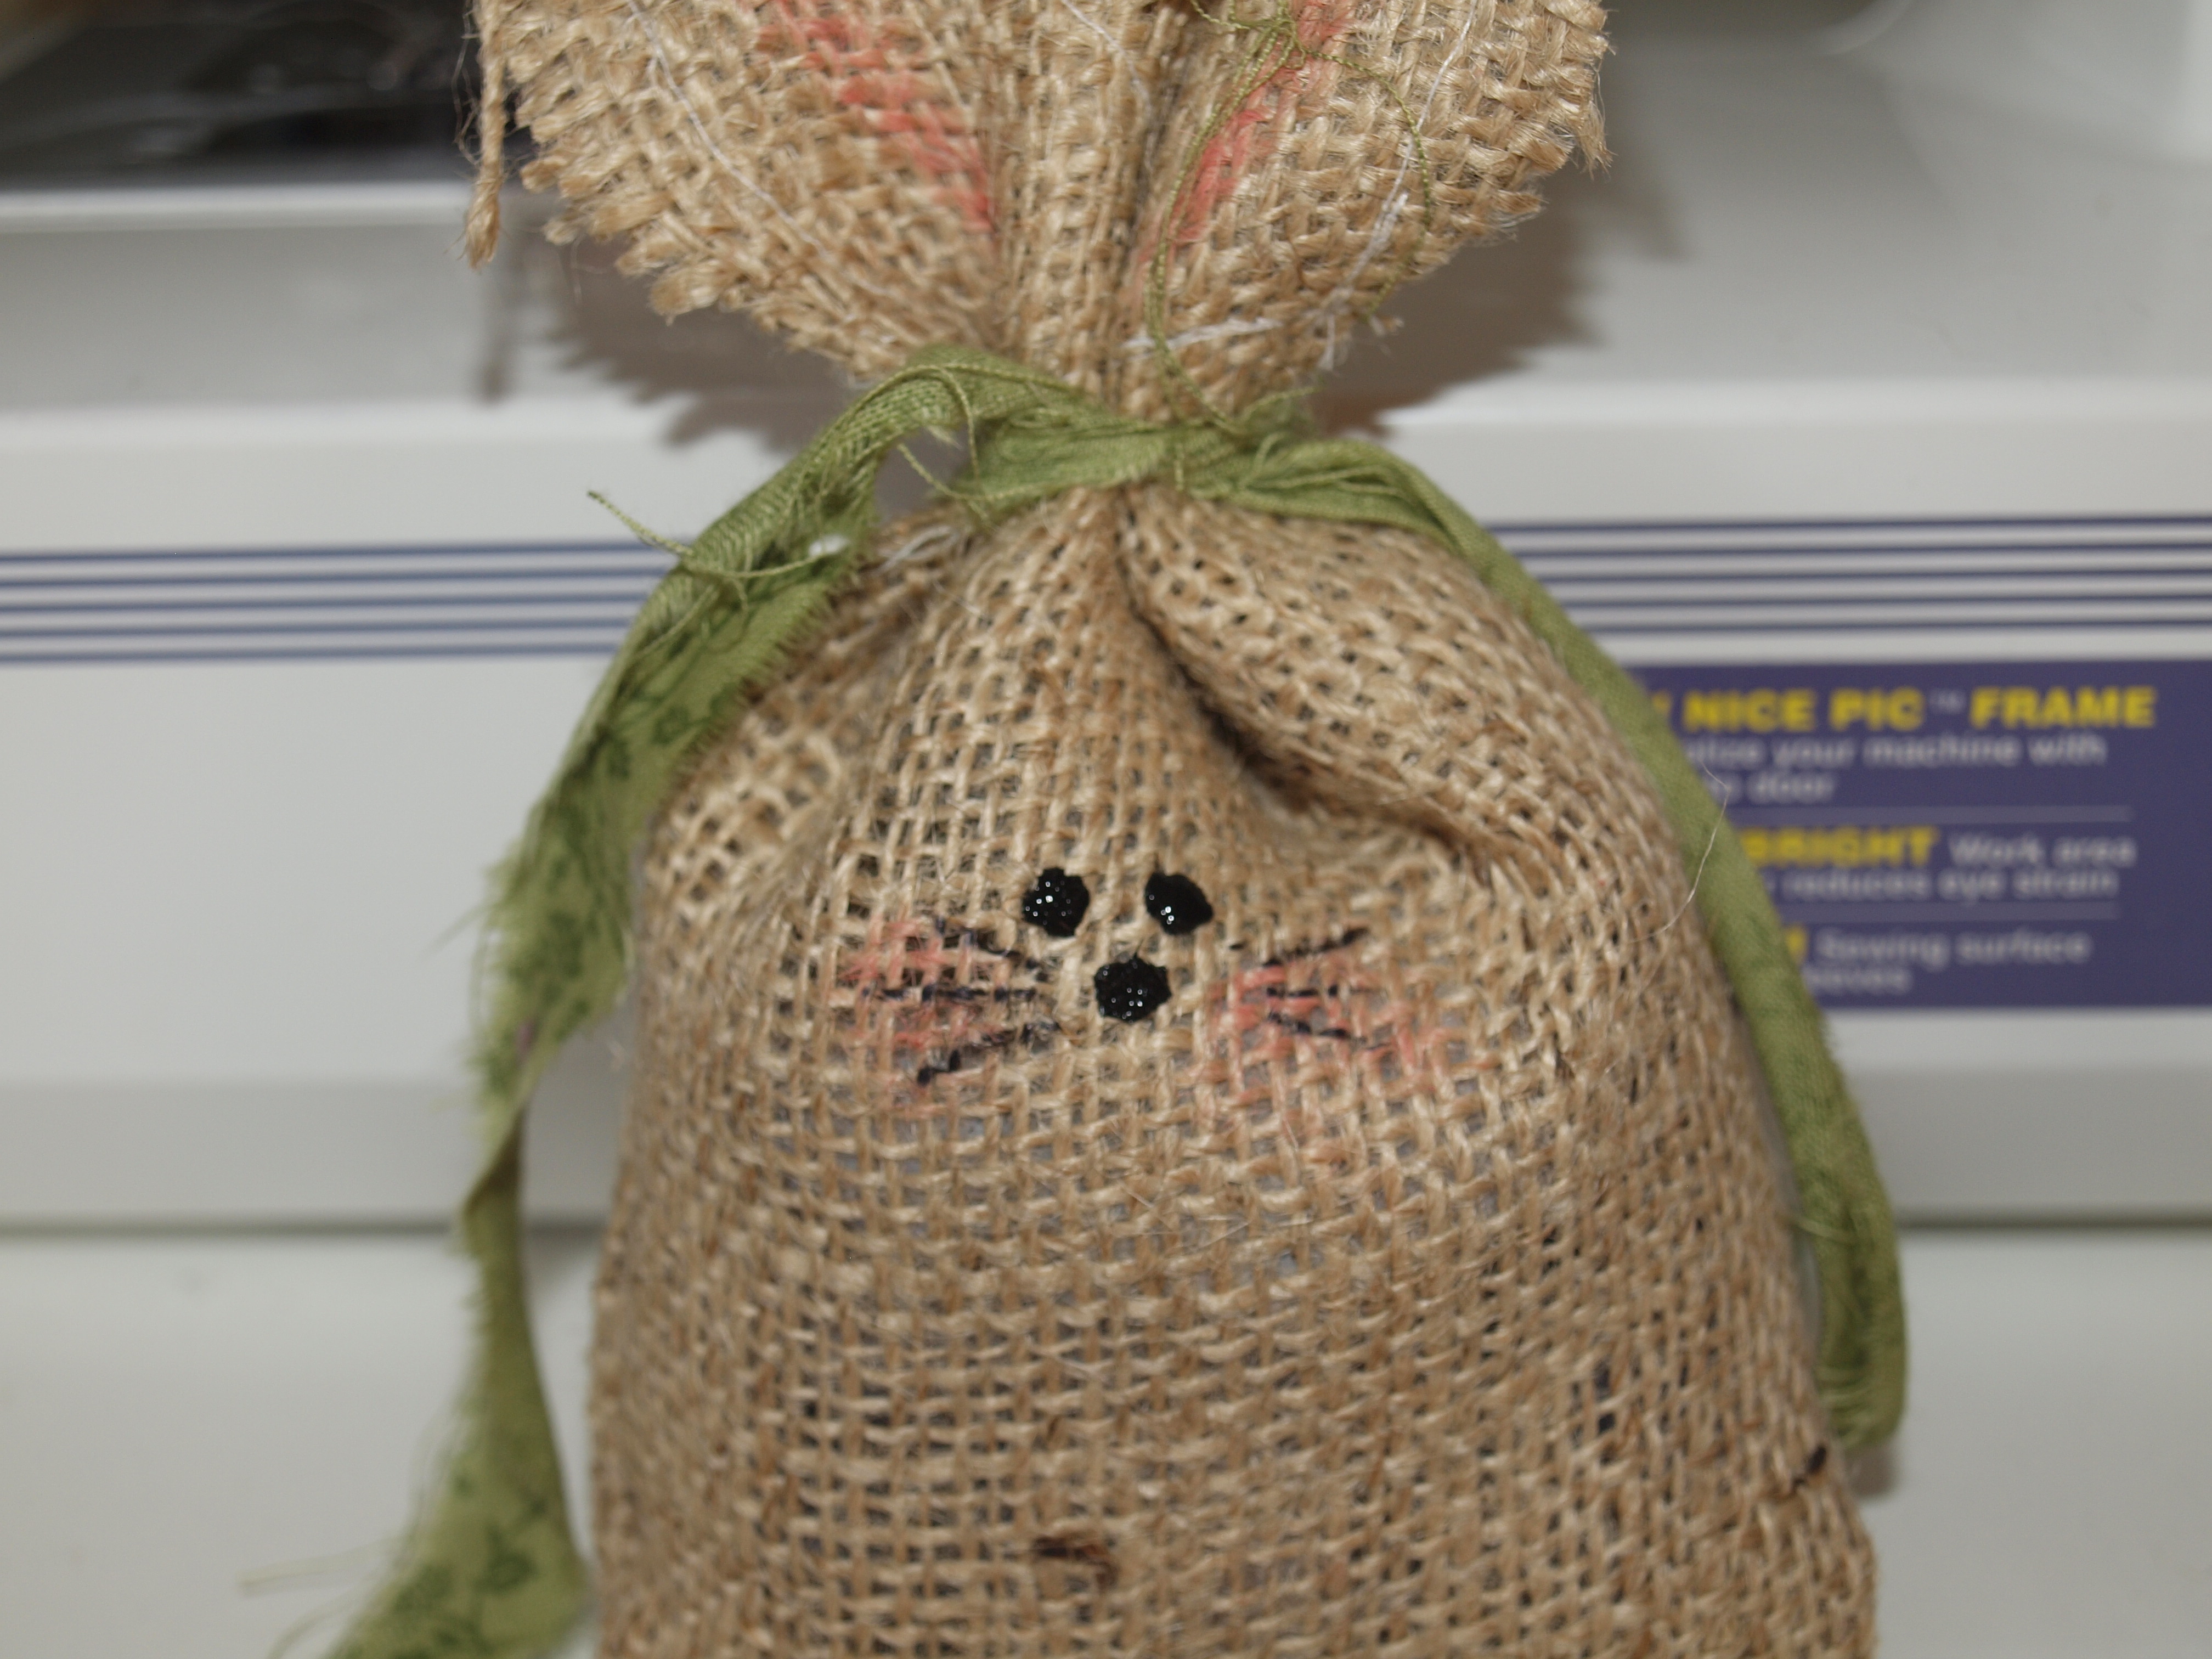
I also decorated with buttons and VOILA.....


No comments:
Post a Comment